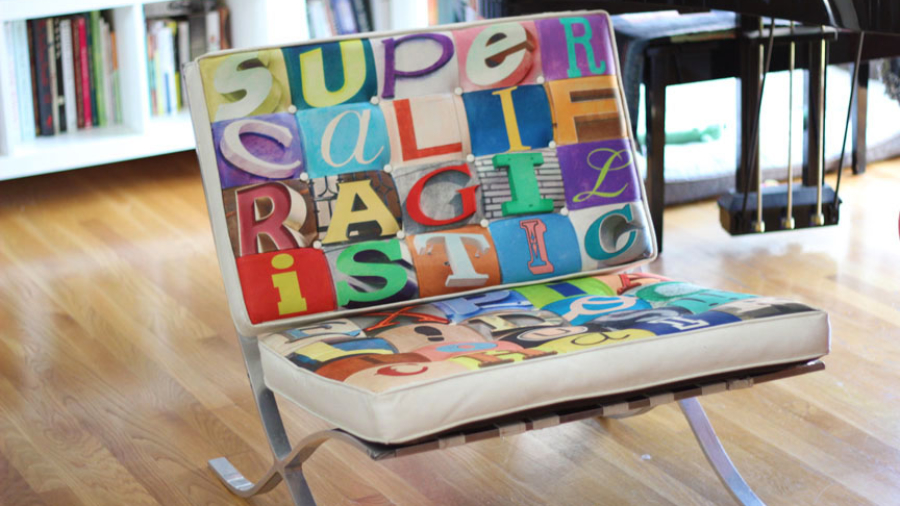
For those of you who’ve seen my video on Kodak Shoe Art Film, aka Craft Attitude, you know I’m addicted to it, and I will decorate any surface with it that I can get my hands on. So I was eyeing my Barcelona chair, and thinking that the faux leather (okay, vinyl) was a lot like a shoe surface, so why not decorate it, right? Once I decided to take the decorating plunge, I had to then figure out what designs I would use for the chair. The chair has 20 “sections” per cushion, so I would need 40 images all together. I thought of doing a word, since I love fonts and alphabets, but I needed a long one; and the longest word I could think of was “supercalifragilisticexpialidocious.” Now that’s a fine word. It’s even in the Oxford Dictionary. The only problem was that it had 34 letters, so I was still 6 short. I decided to add an exclamation point and the word “chair” to it. I found decorating this chair with Craft Attitude even easier than decorating the shoes because I was dealing with simple squares. I think it turned out really well. And yes, you can sit on it.


Here’s how I did it:

1) I bought stock images at bigstockphoto.com for most of the letters. But I needed a lot of some letters, e.g. the “i,” so I created some in Photoshop. Then I printed them two per sheet of Craft Attitude on my inkjet printer, in reverse, since I would be flipping the image over, ink side down.

2) Do a section at a time. Rub a glue stick all over the surface. Use your fingers to even it out, and get the glue under the button tufting.

3) I cut the Craft Attitude film to size before placing it on the chair. Peel the film from the protective backing, and place it ink side down on the glued surface. You can still reposition it when it goes on. Once it’s where you want, smooth it out with your fingers and make sure that every part of the film is adhered to the surface. You’ll notice from this picture that I applied two letters at a time, since this is how they were originally printed. I soon learned that it was much easier to cut the film into individual letters and work one section at a time.

4) Trim excess film with an X-acto knife. You can also use your fingers to tuck the excess film into the edge piping.

5) Lift the button tufting as much as you can and slide the film underneath the buttons, pushing it down with your finger. It helps to cut off the corner of the film so that the film fits under the button. Then keep going until you’ve done the whole chair.

How durable is the film on this chair? Well, I’ve sat on it, and the letters aren’t coming off. Yep, this project definitely makes me “Chair-man of the Not so Bored.”
Aw many I can’t believe you missed the opportunity to spell Fongissupercalifragilisticexpialidocious. That would have included the 6 letters you needed. In any event the letters you chose were awesome! Great job as usual. Now does that match the alphabet wall you had?
Your mind is a terrific thing my dear. This is clever.
“Chair-man of the not so bored”—YOU crack me up!! I love this chair!
Love, love, love it!
Holy cow Jonathan! This is spectacular!